
When I started using Substack, I overlooked an important feature of the platform: you can, indeed, create multiple independent publications, but in the end they’re all linked to a single social profile. Depending on the topics you’re publishing about, it can be helpful to have it all under a single profile, because it can help for discoverability.
My issue, however, was that my two publications had totally different audiences (different languages, interests, goals…), which prevented me from efficiently using social features like Notes, or customizing my profile to share relevant biography info, website and product links…
Because I wanted to grow my audience and engagement on Substack, I started looking for a way to separate my two publications into two profiles, that is, keeping one publication under my current profile (or user account), and creating a new account to publish the second one. Without loosing my subscribers.
At first, it looked like a real pain, I found several posts about having to contact support to request this ownership transfer, which could take a long and undetermined time. But fear not, there’s a DIY solution!
If you’re facing the same issue, here’s the workaround I used to transfer my second publication without complicated manipulations nor relying on Substack’s support! Now, only my publication 1 is visible on my profile 1, and on my new profile 2 you can only see posts from my publication 2. I didn’t loose subscribers, and I can even show past posts in the history on my new account (Activity and Posts) while they don’t appear anymore on my former account.
Understand Substack social functionalities – profile, activity, notes…
First, just to make sure we’re on the same page, here are the social functionalities that are bound to the profile and not to the publication.
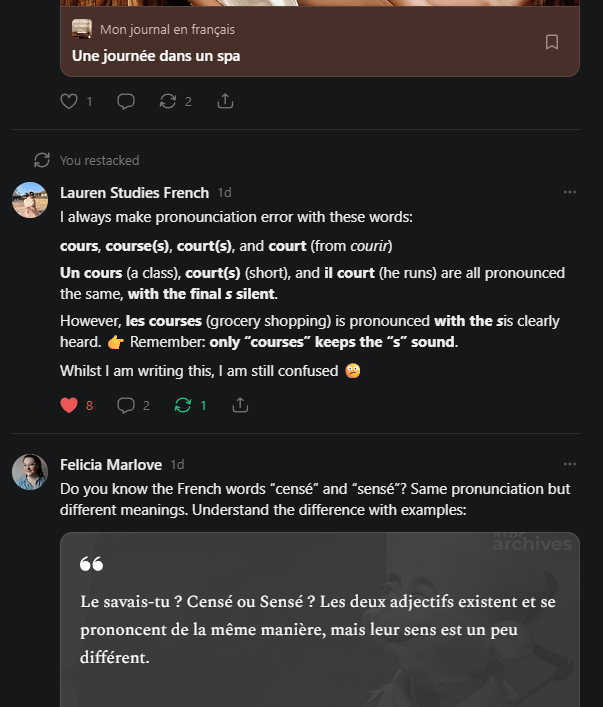
💡In the Substack ecosystem, the “publication” is the newsletter. In this example, the publications are “Mon journal en français” and “The Flonicles sans filtres”.
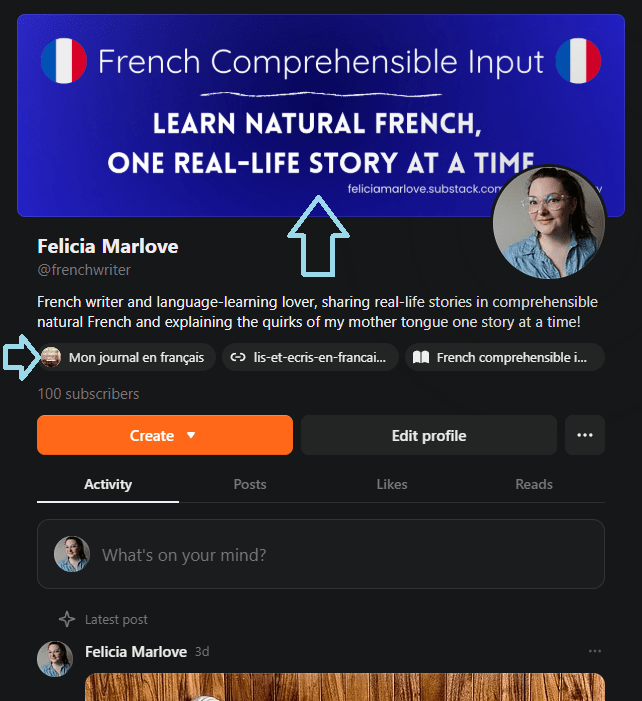
Regarding the profile, there are several elements that can be customised to make it easier for readers to understand what you do and what you write about. First, there’s the profile banner (again, it’s different from the banner you choose for your publication!).
Then, there’s you bio. If you’re working on several really different topics, it’s worth having targeted bios.
Then, there are links. All your public publications (coming back to this notion later!) are shown there, before your custom links. Publications are always shown before your personal links. This means, if you have several publications, it takes some space and lets you display less custom links (like your products or webshop…).
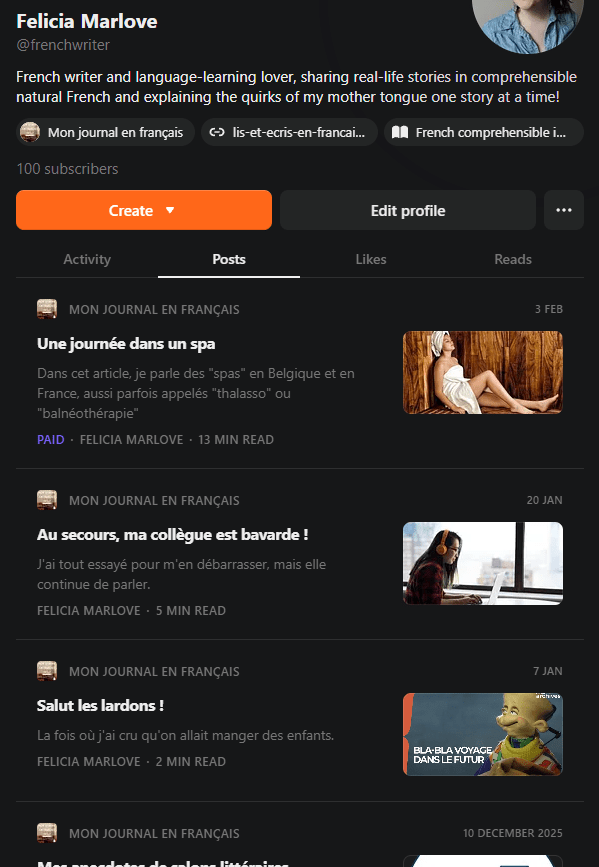
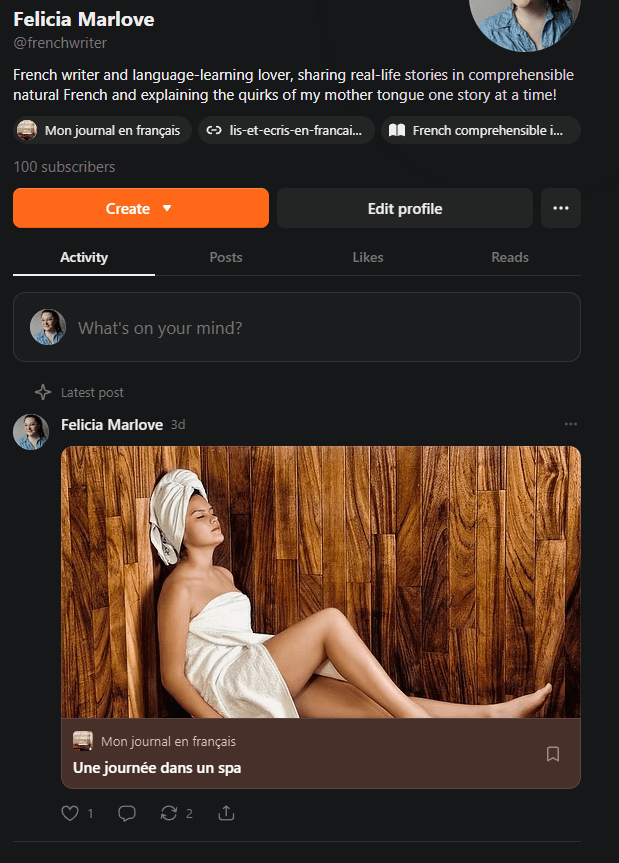
About the social part, there’s your Activity, which shows things you shared, posts you published (on all your public publications) and your Notes.
Notes are basically the things you can publish directly in your feed regardless of your publications. You could totally have a social account on Substack and publish Notes without having your own publication(s). Notes are said to be very important for growth, so it only makes sense that they should be targeted too.
Then the Posts tab just shows all posts of all your public publications as soon as they’re live.
💡People can subscribe to your publication directly, but also to your profile!
The most important thing to understand is that social functionalities are linked to a profile and shared across publications managed by that profile (user account).
Transferring ownership of a publication to another account
Now that you understand why it’s important to have separate accounts for publications that don’t target the same audience at all, let’s see how to achieve the transfer of ownership if, like me, you created two publications under a single account because you were not aware of this.
Create a new account
First step is to create a new account, if you don’t have one already that’s suitable to “host” your second publication. It requires a second email address (you can create aliases with Microsoft Outlook or Gmail, you don’t have to completely register for a new email address).
💡 Tip: Substack, by default, uses email authentication rather than username/password login, but if you have to switch between two accounts I find it easier to create a password. You can do so by visiting the sign-in portal of Substack, choosing “Sign in with password” then pick the option to create a password. Another tip is to log in with two different browsers: one for your first account, one for your second account, so you don’t have to log out and in again and again!
Add your second account to your publication contributors
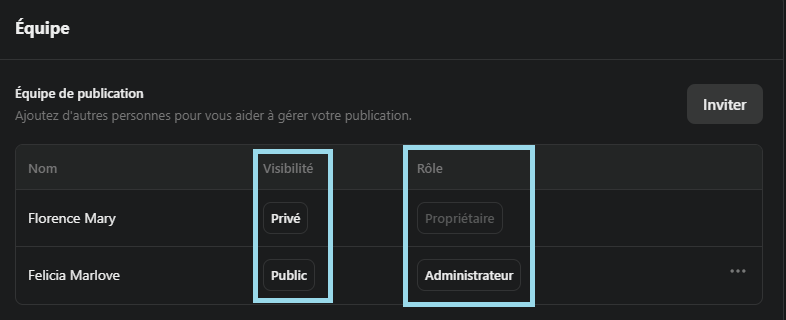
From your first account, go to the publication parameters (Dashboard > Select the publications in the top dropdown menu > Parameters) and navigate to the “Team” section. Then, add a new publication team member (Invite). You’ll have to accept the invitation with your second account (again, easier if you’ve got two different browsers open, so you don’t have to sign out/in/out/in…).
When it’s done, you’ll see the name of your second account in the list of team members. Give your second account the highest privilege, which is Admin. Fair to say, it would probably be enough to give Contributor rights, but it would prevent you from making changes on the publication itself (parameters) from your second account. Your choice!
Change the visibility of the publication
Now, maybe you noticed that team members have roles as well as a level of visibility for the publication (private or public). You want to set the publication visibility to “private” on your former account, and to “public” on your new account.
This is how you hide the publication from the profile, meaning it won’t appear in your links list and the publications will not appear anymore in the Posts list and in your Activity tab.
At this stage, you have something like this (excuse my French, somehow my profile is in English and my publication parameters are in my mother tongue, but words are close enough in both languages anyway).
This concretely means your first account will always be owner of the publication (so it’s not a genuine transfer, for which you would need to contact support), but to readers it will not show. I think it’s a good thing anyway to have a kind of “master account” that owns all of your publications.
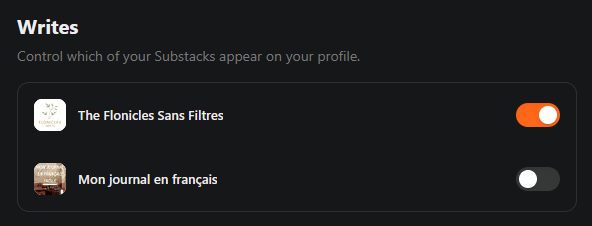
Now, there’s another button that you need to toggle, in your profile settings this time. In the “Writes” section, there’s the list of all the publications you can display on your profile (links in bio and posts in the feed). By the way, if you have several publications under one account, that’s also where you set your primary one.
The previous step was for you, as the owner of the publication, to give rights to team members, but this step is for individual team members to finetune their profile. So yeah, as the owner, it feels like you’re doing the same thing twice.
Showing former posts on your new account
If everything went well, you should see on each profile the link of the relevant publication. If you post something new, you’ll also see that your Activity and Posts tabs show the new posts only on the relevant account. Also, all your subscribers are untouched, since the publication itself didn’t undergo any change!
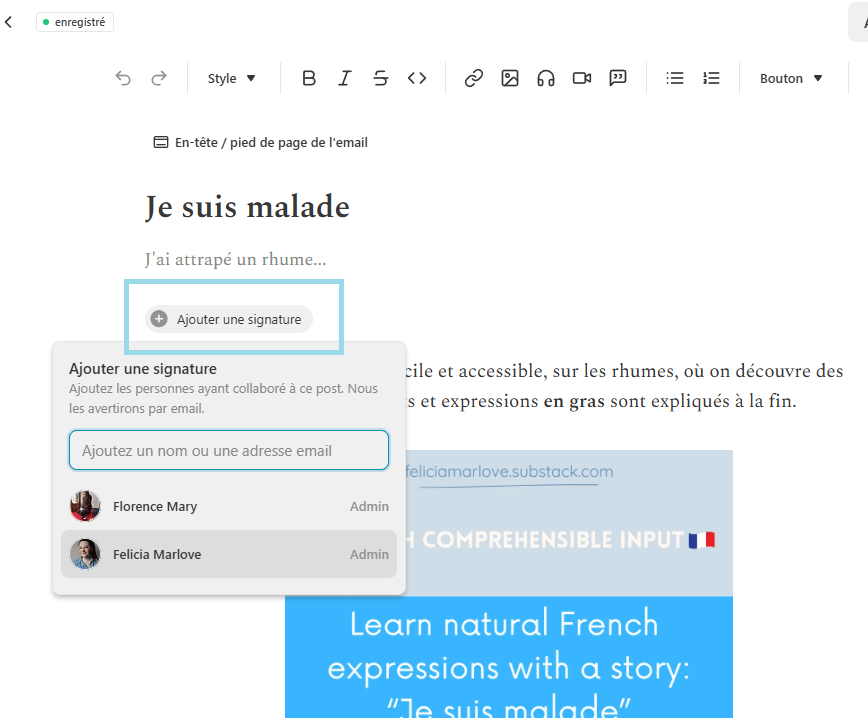
However, your new account might seem a bit empty in the beginning. If you’d like to show former posts on the Posts and Activity tabs, you’ll have to edit the signature on each post (and make sure, in the future, that you use the right signature). It’s a pain because there’s no batch management of posts, so you’ll have to go through each post individually, modify it to change the signature. Even worst, there’s a threshold, so after updating a few posts, you’ll get blocked for an indefinite time (it’ll work the day after, maybe sooner).
This is not a must-do, if you don’t want to spend too long on this, just change the author on a few cornerstone articles or the most recent ones. If you don’t do this, it just means posts will not appear in the “Posts” and “Activity” tabs, but most people will probably not scroll through that list anyway…
Also, you have the opportunity to Restack (reshare) your posts, making them appear in your Activity feed.
So, voilà!
For any question about Substack, customizing your WordPress website, content creation… drop a comment.